
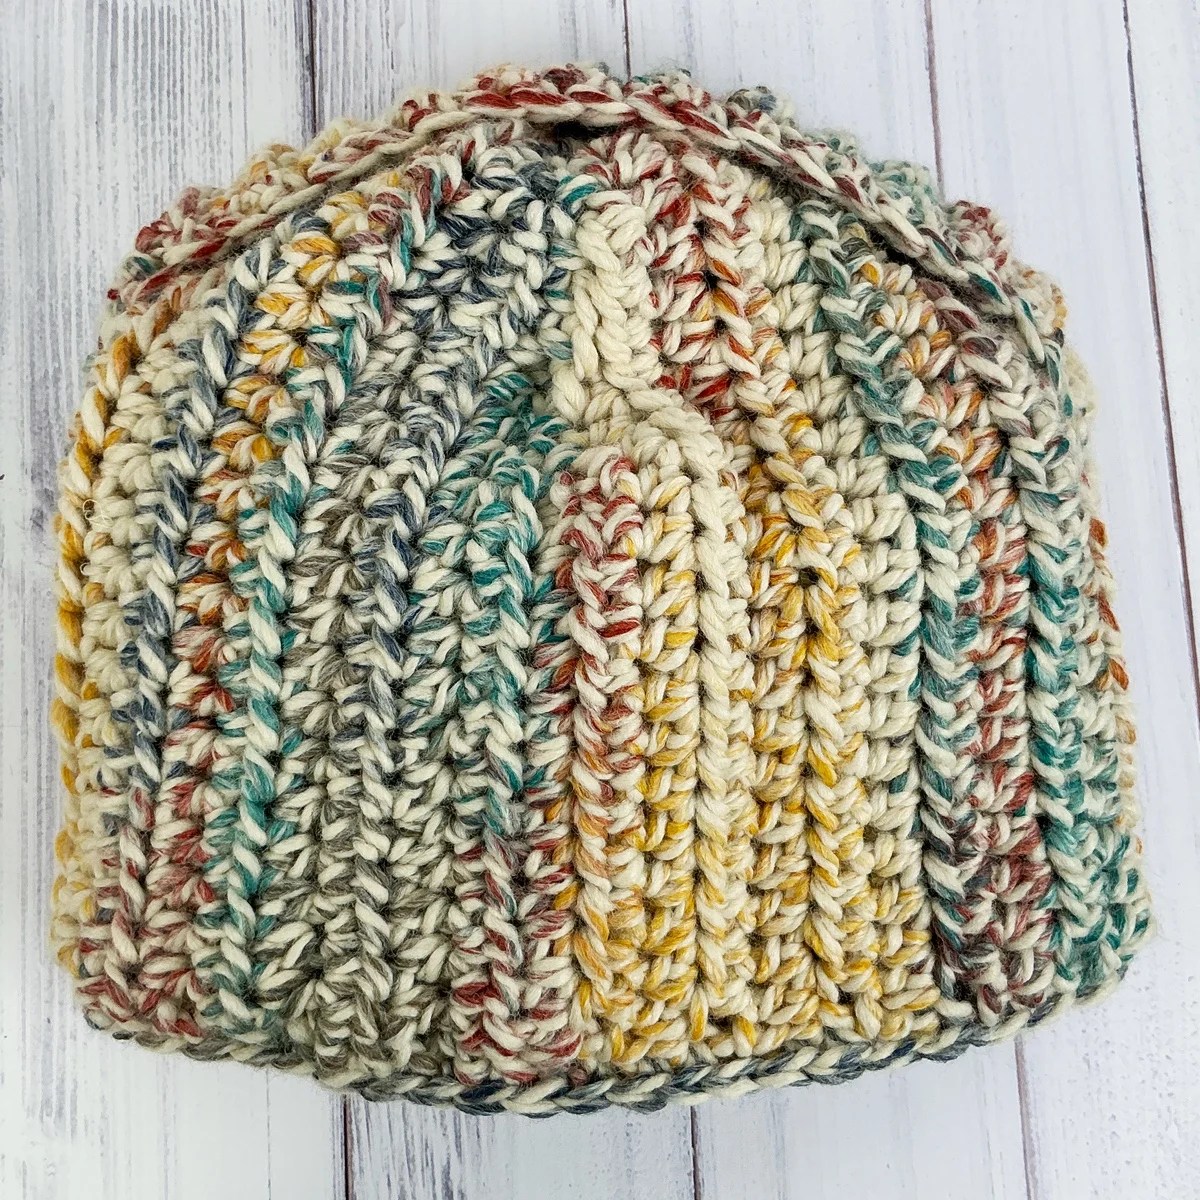
If you have been craving a cozy, country-inspired layer without the massive time commitment of a full sweater, this crochet turtleneck hoodie is your answer. Whether you call it a hooded cowl or a turtleneck hoodie, this is the ultimate cold-weather accessory for anyone who loves that rustic cottagecore aesthetic.
Because we are using super bulky yarn, this project flies off the hook. It is designed to be a “weekend wonder”—satisfying enough to feel like a real garment, but fast enough to finish before the snow melts.

In this post, I’ll walk you through the free pattern for my “Country Cottage” Hood. You will learn how to crochet a stretchy, comfortable ribbed neck that actually stays up, and how to easily add a generous hood that fits perfectly under your favorite winter coat. Grab your 9.0 mm hook—let’s get stitching!
Finished Size: Let’s start by saying this is a very stretchy fabric and I will give you lots on info on modifications. But the pattern is written to finish when measured flat and unstretched at 26″ in circumference around the bottom neckline, and 28″ in circumference around the front neck opening.
Materials:
320 yds wool blend Super Bulky (CYCA 6, Super Bulky) yarn. Model shown in Lion Brand Yarns Wool Ease Thick & Quick (80% acrylic/20% wool; 5 oz, 87 yds), 4 skeins Hudson Bay #610B (affiliate link)
Crochet hook size 9.0mm or size needed to obtain gauge
Wonder clips or straight pins
Tapestry needle (and maybe a needle threader, this yarn is thick!)
Gauge: 7.5 sts x 6 rows = 4″ in hdc
You can purchase an ad-free PDF or add this pattern to your Ravelry queue on Ravelry, or grab a copy from my Shopify shop!
Abbreviations:
Beg – beginning
BLO – back loop only
Ch – chain
Hdc – half double crochet
Rep – repeat
Sc – single crochet
Sl st – slip stitch
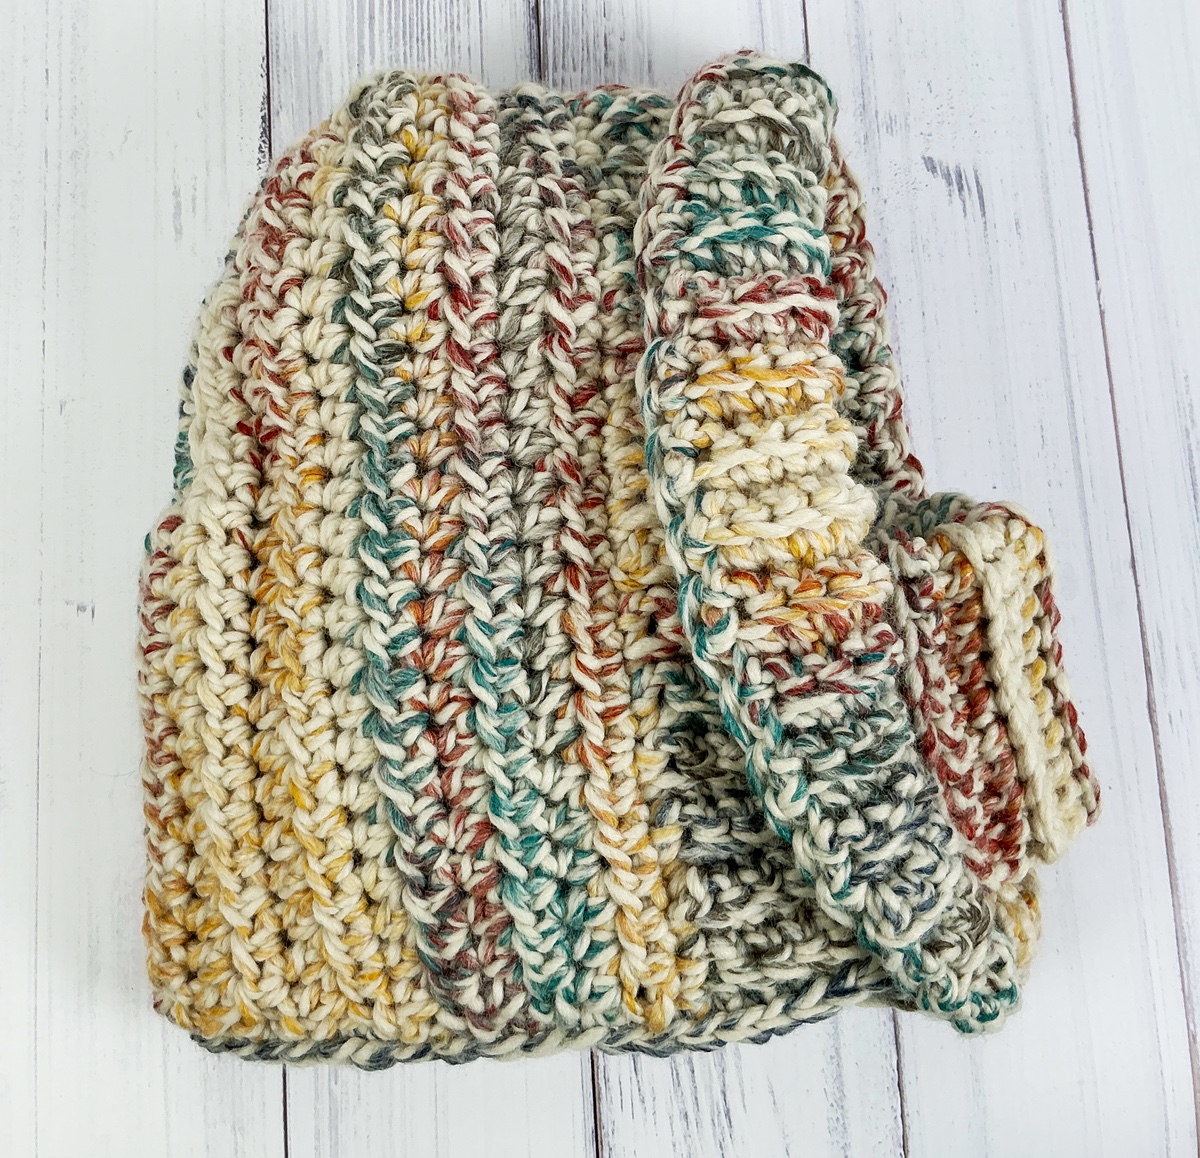
Turtleneck Hoodie
Fitting notes for the Turtleneck (noting that if you make changes to the pattern you may need a different amount of yarn!): My turtleneck finished around 12″ in height, 6″ when folded down. If this is too much turtleneck for you, you can chain fewer stitches than I did so it is shorter.
If you want to adjust the circumference of the turtleneck, noting that you want a close fit but it still has to be large enough to fit over your head to put on, you can adjust the length of the turtleneck piece before sewing – longer for a looser fit, shorter for a closer one.
Turtleneck:
Ch 24.
Row 1: Sc in 2nd ch from hook and in each ch across. Ch 1, turn. 23 sc
Row 2: ScBLO in each sc across. Ch 1, turn.
Rep Row 2 for pattern until work measures 24″ making sure there is an odd number of rows. Do not end off.
Sl st the two short sides together (the foundation chain and the last row) working in BLO. Do. not end off.
Sc around the turtleneck, working 1 sc at the end of each row. Join rnd with sl st in first sc and end off, or make an invisble join as shown in the video. This is the bottom edge – it may stretch out a small amount but that is ok.
Set aside the turtleneck for later.
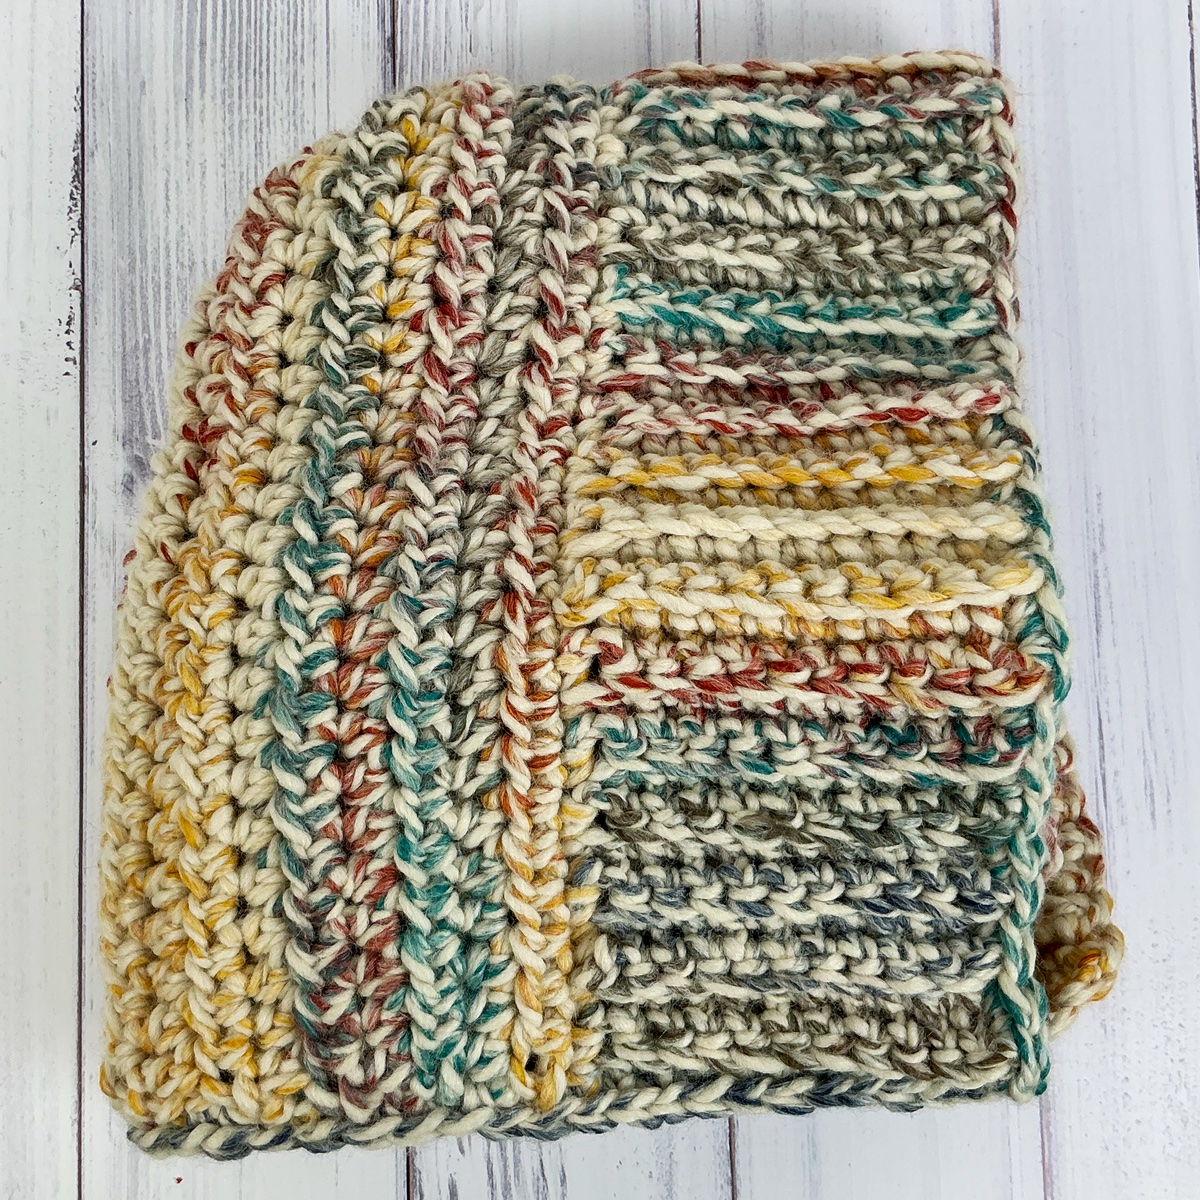
Hood:
Fitting Notes for the Brim: If you would like the hood opening to be larger or smaller, adjust the length of the brim piece, longer for a larger opening, shorter for a closer one.
Brim:
Ch 12.
Row 1: Sc in 2nd ch from hook and in each ch across. Ch 1, turn. 11 sc
Row 2: ScBLO in each sc across. Ch 1, turn.
Rep Row 2 for pattern until work measures 26″, do not end off.
Turn work to work 50 sc across one long side of brim. Unlike the turtleneck edging you do NOT want the work to spread out. End off. Note: If you have adjusted the length of this piece at all you will have to adjust the number of sc. Essentially you want 4 sc over every 5 rows, and the work to lay flat.
Work the same number of sc on the opposite long side, 50 if you are following my pattern, adjust as needed if not. Do not end off.
Hood Back:
Fitting notes for the Hood Back: You may have to eyeball it a little here if you have changed the neck opening. If you have made it larger, work even in hdc longer than 7 rows, if you have made it smaller, work even for fewer hdc rows.
If you have changed the front opening/height of the hood you may have to adjust the short row section. Essentially you want to crochet your first short row to the number equaling total number of stitches, minus 6, divided by two. As an example for the pattern there were 50 hdc, minus 6 left 44 hdc, divided by 2 equaled 22 sts in the first short row. Once you have adjusted the first of the short rows the rest of the instructions will work as written.
Turn work, ch 2.
Row 1: Hdc in each sc across. Ch 2, turn. Ch-2 counts as a st here and throughout. 50 hdc
Rows 2 – 7: Hdc in each hdc across. Ch 2, turn.
Row 8 (begin short rows): Hdc across until 22 hdc have been completed. Ch 1, turn. Leave remaining sts unworked for now. 22 hdc
Row 9: Sl st in each of first 3 hdc, hdc in each hdc across to end. Ch 2, turn. 19 hdc
Row 10: Hdc across until 16 hdc have been completed. Ch 1, turn. 16 hdc
Row 11: Sl st in each of first 3 hdc, hdc in each hdc across to end. End off. 13 hdc
Row 12 (second short row section): Leaving 6 sc empty in the middle of the sc row, join yarn with a standing HDC in next sc, and hdc in each sc to end. Ch 2, turn. 22 hdc
Row 13: Hdc across until 19 hdc have been completed. Ch 1, turn. 19 hdc
Row 14: Sl st in each of first 3 hdc, hdc in each hdc across to end. Ch 2, turn. 16 hdc
Row 15: Hdc across until 13 hdc have been completed. End off.
Final Assembly:
Fold hood in half and single crochet the center back seam together.
Align the turtleneck seam so it is (more or less) in the center back and pin the bottom edge of the Hood (right side out – see the video if you need help here!) to the bottom edge of the turtleneck (that has the sc edging on it). The Brim and the Turtleneck will line up stitch to stitch in the front, you may have to ease the hood a bit to make the back part line up but it should be very close. Pin or clip it.
Sc the Hood and the bottom edge of the Turtleneck together, beginning and ending at the center front. Join the round with a sl st in the first sc and end off, or (recommended) the invisible join shown in the video.
Weave in all ends and you are all finished!