
Transform your fabric scrap crafts into adorable personalized keychains in just 20 minutes! If you’ve been scrolling through social media seeing those trendy puffy letter name banners, I’ve got an even better project for you. These fabric letter keychains are faster, easier, and make perfect last-minute gifts.
As someone who’s been teaching sewing and crafting for years, I’ve discovered that the best projects are the ones you can actually finish. This sewing keychain tutorial is designed for beginners and uses materials you probably already have in your craft stash.

Why Fabric Letter Keychains Make Perfect Gifts
Letter keychains have become incredibly popular for good reason. They’re:
- Personalized and meaningful – Everyone loves seeing their initial on accessories
- Budget-friendly – Each keychain costs under $2 to make
- Quick to create – Perfect for last-minute gift needs
- Versatile – Great for backpack charms, zipper pulls, or bag tags
- Beginner-friendly – No advanced sewing skills required
Unlike traditional puffy letter banners that can take hours to complete, these mini versions are practical, portable, and actually get used. They make excellent stocking stuffers, teacher appreciation gifts, craft fair inventory, or personalized party favors.
Materials Needed for Your Sewing Keychain Project
One of the best things about this fabric scrap project is that you likely have everything you need already! Here’s what you’ll gather:
Essential Materials:
- Fabric scraps (at least 5″ x 6″ per letter – different letters have different widths) – cotton quilting fabric works best
- Batting scraps or fusible fleece scraps
- Letter Stencils – mine came from Michaels
- Keychain hardware (split rings or lobster clasps)
- Sewing machine – I am using my Necchi NC 102-D
- Thread matching your fabric – Superior Threads Sew Complete Set in Pastels is what I used
- Pinking Shears
- Pins or fabric clips
- Fabric marker or pencil
Pro tip: Raid your fabric scrap bin! This is the perfect project for those leftover pieces from other sewing projects. Even small scraps work beautifully for these mini letters.
Keychain Instructions:
Press your fabrics first for smooth sailing!
Zigzag your batting pieces together if needed to avoid them slipping during assembly.

Strap – Cut a piece approximately 2″ x 3″. Fold wrong sides together and finger press, roller, or iron to mark the center, then fold each raw edge in to the center crease and press. Top stitch down each long edge, as close to the fold as you can comfortable manage. Set aside.
Mark one Layer – Use a disappearing fabric pen or marker and trace the outline of your chosen letter, using the stencil. You do not have to trace around the plastic bits that hold the stencil together, only the broad outline.

Assemble the Layers –
Place unmarked fabric right side down, batting, then marked fabric right side up.
Fold the key ring strap in half, raw edges together, and slide the split ring onto it. Find a spot on your letter wide enough for the strap to sit in, insert the raw edges of the strap between the layers leaving about 1/2″ inside.
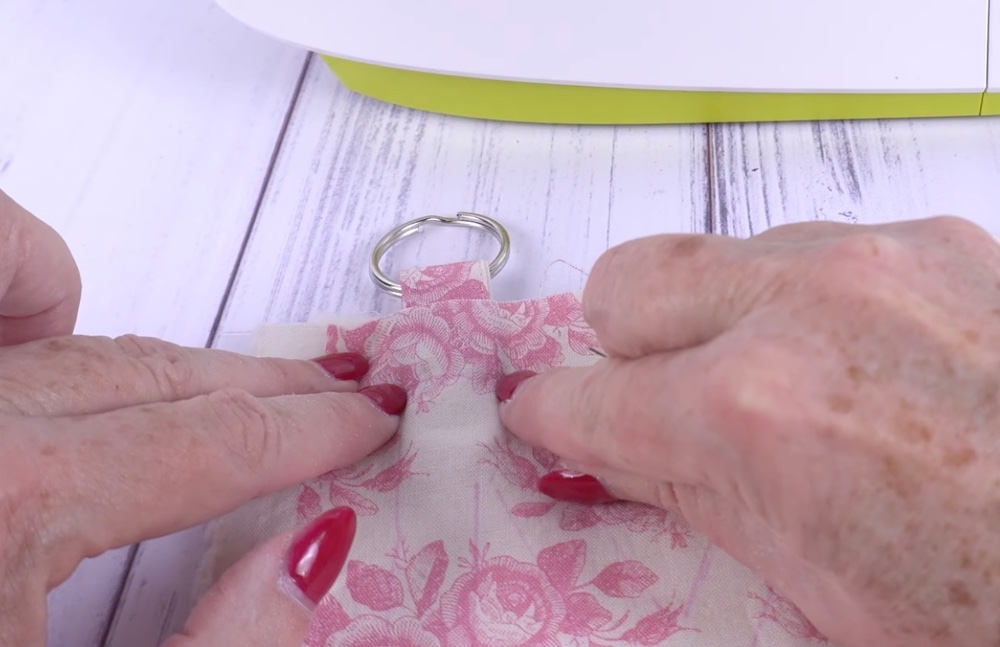
Sewing and Pinking –
Topstitch along your drawn outline, lock stitching at the beginning and the end, and backstitching over the keyring strap for durability.
Using the pinking shears cut around the outline about 1/4″ away from the stitch line, being careful to cut the layers separately over and under the strap so you don’t cut it off!

Trim your threads and you are all done – no stuffing, no turning, no fuss!
Modifications:
For puffier letters you can add some additional layers of fleece or batting – the more layers the puffier the finished letter.
If you would like them fatter, mark as instructed but instead of sewing directly on the line, you can sew 1/4″ – 3/8″ away from the line.
Why This Project Is Perfect for Your Fabric Scrap Stash
If you’re like most sewers, you have a bin (or three!) overflowing with fabric scraps that are too small for major projects but too nice to throw away. These keychains are the perfect solution!
Each letter uses approximately 5″ x 6″ of fabric – those awkward leftover pieces that are too small for most projects. You can mix and match prints, use up single-color scraps, or coordinate with specific color schemes.
Sustainability bonus: This is an excellent zero-waste sewing project. Even the tiniest scraps can be used for stuffing or combined into patchwork letters.
Take Your Fabric Scrap Crafts to the Next Level
Ready to see this project in action? Watch my complete video tutorial where I walk you through every step, show you my favorite tricks for perfect corners, and demonstrate the fastest stuffing technique.
Don’t forget to subscribe to my channel for more beginner sewing tutorials, fabric scrap projects, and creative crafting ideas. I post new videos every week with practical projects you can actually finish!
What letter will you make first? Drop a comment on the video and let me know! I love seeing your finished projects – tag me on social media with your creations.